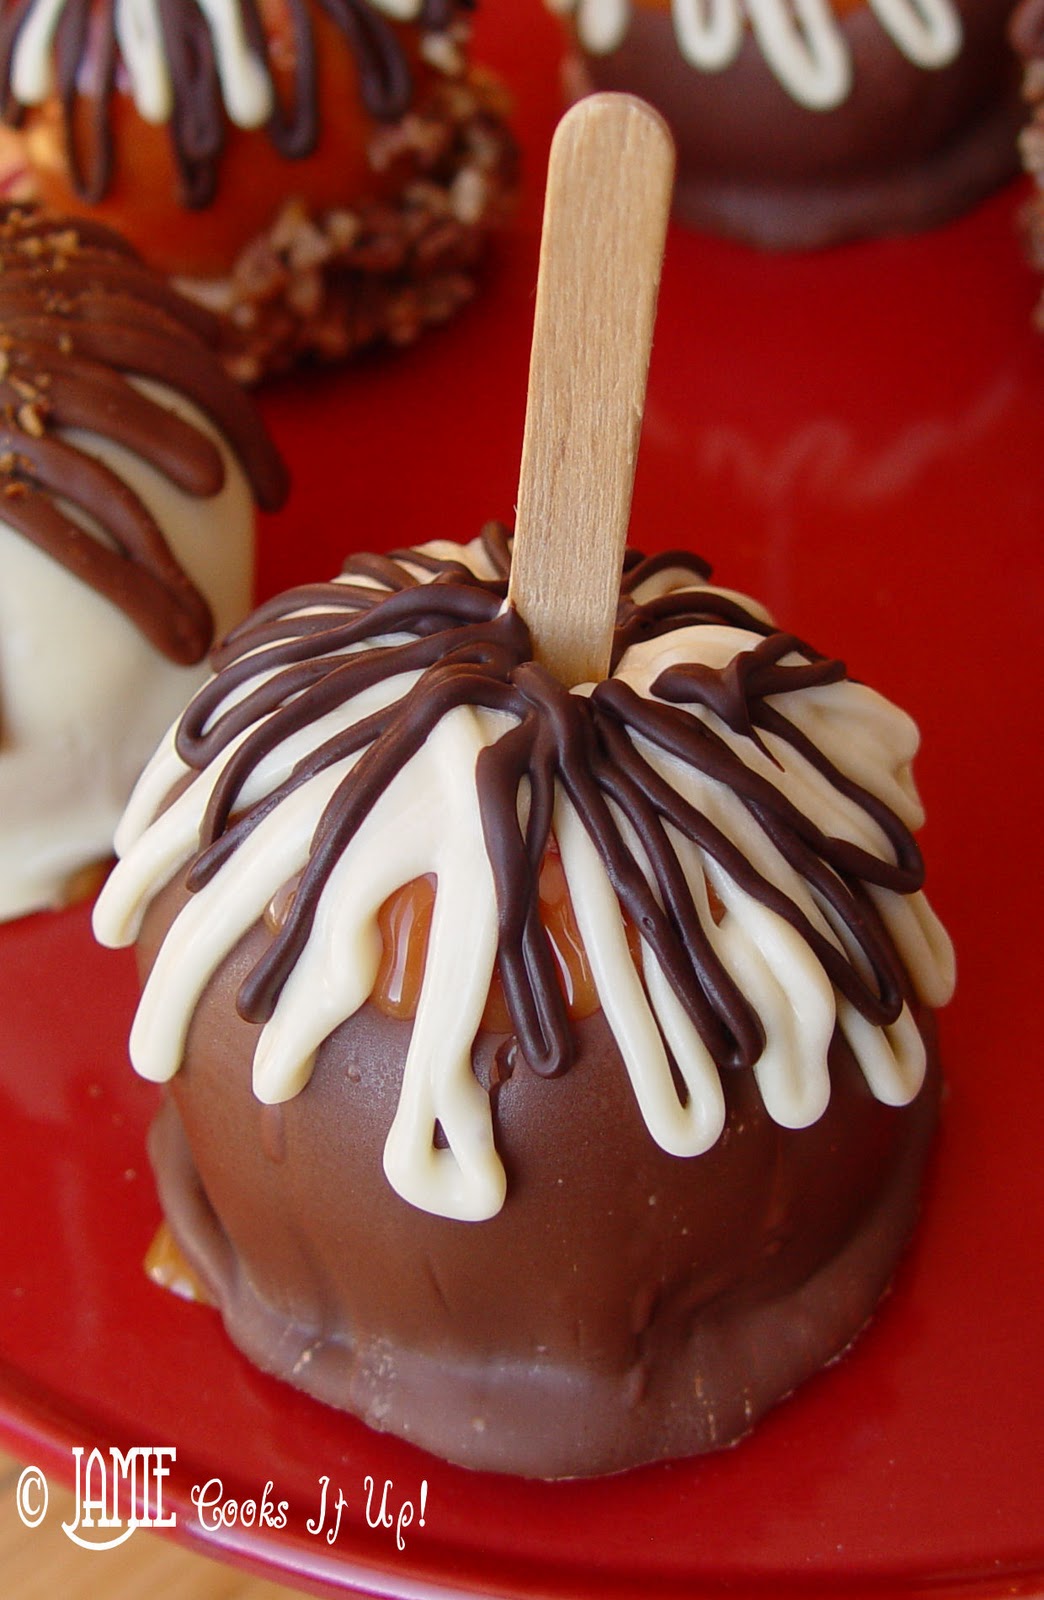
Caramel-Dipped Apples
- Preparing Time: -
- Total Time: -
- Served Person: Makes 12 apples
- 1/4 teaspoon salt
- 1 1/2 teaspoons vanilla extract
- 1/3 cup pure maple syrup
- 2/3 cup dark corn syrup
- 1 1-pound box dark brown sugar
- 16 tablespoons unsalted butter, room temperature
- 1 14-ounce can sweetened condensed milk
- 1 teaspoon robust-flavored (dark) molasses
- 12 chopsticks
- 12 medium granny smith apples
- assorted decorations (such as chopped nuts, dried apricots and dried cranberries, toffee bits, mini m&m's and candy sprinkles)
- melted dark, milk and/or white chocolates
- whipping cream (if necessary)
Homemade Caramel Apples: A Spooktacular Halloween Treat
Halloween. The word conjures up images of spooky decorations, mischievous trick-or-treaters, and of course, the sweet treats that make the holiday so much fun. This year, I decided to ditch the store-bought candy and embrace the joy of making something special with my family – homemade caramel apples! It turned out to be a wonderfully engaging activity that combined the thrill of creating something delicious with the satisfaction of spending quality time together.
The idea sprang from a desire to create something more personal and wholesome than the mass-produced sweets often associated with Halloween. I remembered making caramel apples as a child, the sticky sweetness coating my fingers, the satisfying crunch of the apple contrasting with the smooth caramel. Recreating that memory was a big part of my motivation. And let me tell you, nothing beats the sheer joy of watching children's faces light up as they bite into a perfectly crafted caramel apple, bursting with flavour and festive decorations.
Why Homemade is Best
Making caramel apples from scratch might seem daunting, but it's surprisingly straightforward. The result is infinitely superior to store-bought versions. You have complete control over the ingredients, ensuring freshness and avoiding artificial additives. Plus, the process of making them offers a fantastic opportunity to get the kids involved. My little ones loved measuring ingredients, stirring the bubbling caramel (under close supervision, of course!), and carefully decorating their creations with sprinkles, nuts, and chocolate. It transformed a simple cooking task into a fun family bonding experience.
Beyond the Basic Apple: Decorating Ideas
The beauty of homemade caramel apples lies in their customizability. While the classic caramel-coated apple is a delight in itself, the decorating possibilities are endless. We experimented with various toppings, including chopped nuts (pecans, walnuts, almonds – anything goes!), dried cranberries and apricots for a touch of tartness, colorful sprinkles for a festive touch, and even mini M&Ms for extra chocolatey goodness. The kids really enjoyed the creative freedom to design their own personalized treats, resulting in a colourful array of unique and delicious caramel apples.
Tips for Success
Granny Smith apples are best for this recipe, as their tartness balances the sweetness of the caramel beautifully. Make sure your apples are firm and blemish-free for the best results. Using a candy thermometer is crucial for achieving the perfect caramel consistency; don't skip this step!
Remember, patience is key when making caramel. It takes time for the sugar to dissolve and the caramel to reach the right temperature. But trust me, the wait is worth it. The glossy, richly coloured caramel, perfectly coating the crisp apples, is a sight to behold.
And the best part? These delicious homemade caramel apples are not only a perfect Halloween treat, but also a wonderful way to create lasting memories and celebrate the season with loved ones. So, ditch the store-bought treats and try your hand at making these delightful caramel apples. It's a recipe for success, both in the kitchen and in creating special moments with your family.
Step-by-step
- Combine first 8 ingredients in heavy 2 1/2-quart saucepan (about 3 inches deep). Stir with wooden spatula or spoon over medium-low heat until sugar dissolves (no crystals are felt when caramel is rubbed between fingers), occasionally brushing down sides of pan with wet pastry brush, about 15 minutes.
- Attach clip-on candy thermometer to side of pan. Increase heat to medium-high; cook caramel at rolling boil until thermometer registers 236°F, stirring constantly but slowly with clean wooden spatula and occasionally brushing down sides of pan with wet pastry brush, about 12 minutes. Pour caramel into metal bowl (do not scrape pan). Submerge thermometer bulb in caramel; cool, without stirring, to 200°F, about 20 minutes.
- While caramel cools, line 2 baking sheets with foil; butter foil. Push 1 chopstick into stem end of each apple. Set up decorations and melted chocolates.
- Holding chopstick, dip 1 apple into 200°F caramel, submerging all but very top of apple. Lift apple out, allowing excess caramel to drip back into bowl. Turn apple caramel side up and hold for several seconds to help set caramel around apple. Place coated apple on prepared foil. Repeat with remaining apples and caramel, spacing apples apart (caramel will pool on foil). If caramel becomes too thick to dip into, add 1 to 2 tablespoons whipping cream and briefly whisk caramel in bowl over low heat to thin.
- Chill apples on sheets until caramel is partially set, about 15 minutes. Lift 1 apple from foil. Using hand, press pooled caramel around apple; return to foil. Repeat with remaining apples.
- Firmly press decorations into caramel; return each apple to foil. Or dip caramel-coated apples into melted chocolate, allowing excess to drip off, then roll in nuts or candy. Or drizzle melted chocolate over caramel-coated apples and sprinkle with decorations. Chill until decorations are set, about 1 hour. Cover; chill up to 1 week.



