Home
- 1/2 cup powdered sugar
- 2 tablespoons powdered sugar
- 1 cup sliced fresh strawberries
- 1 1/4 cups graham cracker crumbs
- 1 (21 ounce) can cherry pie filling
- 6 tablespoons vegan buttery sticks, melted
- 2 (8 ounce) containers nondairy soy cream cheese substitute
- 3/4 cup almond breeze vanilla almondmilk, divided
- 2 pkg. (4 serving size) white chocolate instant pudding mix
Step-by-step
- In a medium bowl, mix cracker crumbs, melted buttery sticks, and 2 tablespoons powdered sugar. Press into the bottom and 1/2 inch up the sides of a 9-inch springform pan. Set aside.
- In a large bowl, beat cream cheese substitute and 1/2 cup powdered sugar with an electric mixer on low speed. Beat on medium speed until smooth and creamy, slowly adding 1/4 cup of the almond milk. Stop the mixer. Add pudding mix. Beat on low speed until mixed. Beat on medium speed until smooth. Slowly add the remaining almond milk; beat until smooth and creamy.
- Spread the filling over the crust. Cover loosely and refrigerate for at least 6 hours.
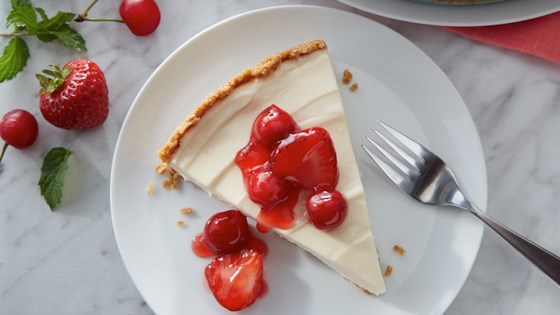
- When ready to serve, mix cherry pie filling and strawberries in a medium bowl. Cut the cheesecake into wedges. Top with the fruit topping. Store in the refrigerator.
A Simple, Delicious Vegan Cheesecake: Perfect for Any Occasion
As a busy working mom, finding time to bake is a luxury, not a given. But sometimes, you crave something special – something that tastes like indulgence without the guilt, something that can be made ahead of time and still impress. That’s where this vegan cheesecake comes in. This recipe is my go-to for potlucks, birthdays, or simply a quiet evening at home. It’s surprisingly easy to make and requires minimal ingredients, most of which are likely already in your pantry.
The beauty of this recipe lies in its simplicity and adaptability. The base is a classic graham cracker crust, given a vegan twist with buttery sticks. The filling is light, creamy, and subtly sweet, thanks to the combination of soy cream cheese substitute and instant pudding mix. The almond milk adds a delicate nutty flavor and keeps the texture beautifully smooth. And the fresh strawberry and cherry topping? Pure perfection. It adds a burst of juicy sweetness that balances the creamy richness of the cheesecake perfectly.
What I love most about this recipe is its versatility. Feel free to experiment with different fruit toppings – blueberries, raspberries, or even a mixed berry compote would be delicious. You could also add a swirl of chocolate ganache for an extra decadent touch. The possibilities are endless!
Making it Ahead: The best part? This cheesecake can be made a day or two in advance. In fact, the flavors meld beautifully overnight in the refrigerator, resulting in a richer, more intense flavor. This makes it perfect for busy schedules, allowing you to prepare it ahead of time and simply enjoy the delicious results when the time comes.
Serving Suggestions: This cheesecake is delightful served chilled, either in wedges or as individual servings. It’s a great dessert for any occasion, from casual gatherings to special celebrations. Serve with a cup of coffee or tea for the ultimate comforting treat.
Beyond the Recipe: Baking isn’t just about following instructions; it’s about creating memories and sharing joy. The aroma of freshly baked goods filling your kitchen, the satisfaction of creating something delicious from scratch – these are the moments that make baking so rewarding. This vegan cheesecake recipe is more than just a dessert; it's a small act of self-care, a chance to slow down and appreciate the simple pleasures in life.
I hope you enjoy this recipe as much as I do. Let me know in the comments how yours turned out! Happy baking!
Tips and Variations:
- For a richer crust, use more melted buttery sticks.
- If you don't have almond milk, you can substitute with soy milk or oat milk.
- Add a teaspoon of vanilla extract to the filling for an enhanced flavor.
- To make individual cheesecakes, use ramekins or small springform pans.
- Garnish with fresh mint leaves or a sprinkle of powdered sugar for an elegant touch.
This simple vegan cheesecake is a testament to the fact that delicious and healthy desserts don't have to be complicated. It’s a perfect recipe for anyone looking for a satisfying and guilt-free treat. So go ahead, give it a try, and let the delightful flavors transport you to a world of sweet indulgence.
Remember to adjust the sweetness according to your preference. You can always add more or less powdered sugar depending on your taste. This recipe is a great starting point, feel free to experiment and personalize it to your liking! Happy baking!



